Visualizzazione post con etichetta crm7. Mostra tutti i post

mercoledì 25 luglio 2012

Display hidden blocks in component PRD01OV

Component PRD01OV has several blocks that can be added to the main view (MaterialOV). Although I moved many blocks in displayable part, those blocks are not visible in the configuration:


This is not due to the fact that blocks are hidden, but this issue is related to the relationship types activated in product category. To solve this issue go to transaction COMM_HIERARCHY, select the appropriate hierarchy and category then select tab "Relationship type" and add the relationship you need:

When done you will see in WebUI that all blocks in displayable part will be shown:

Disable + and - buttons in advanced search

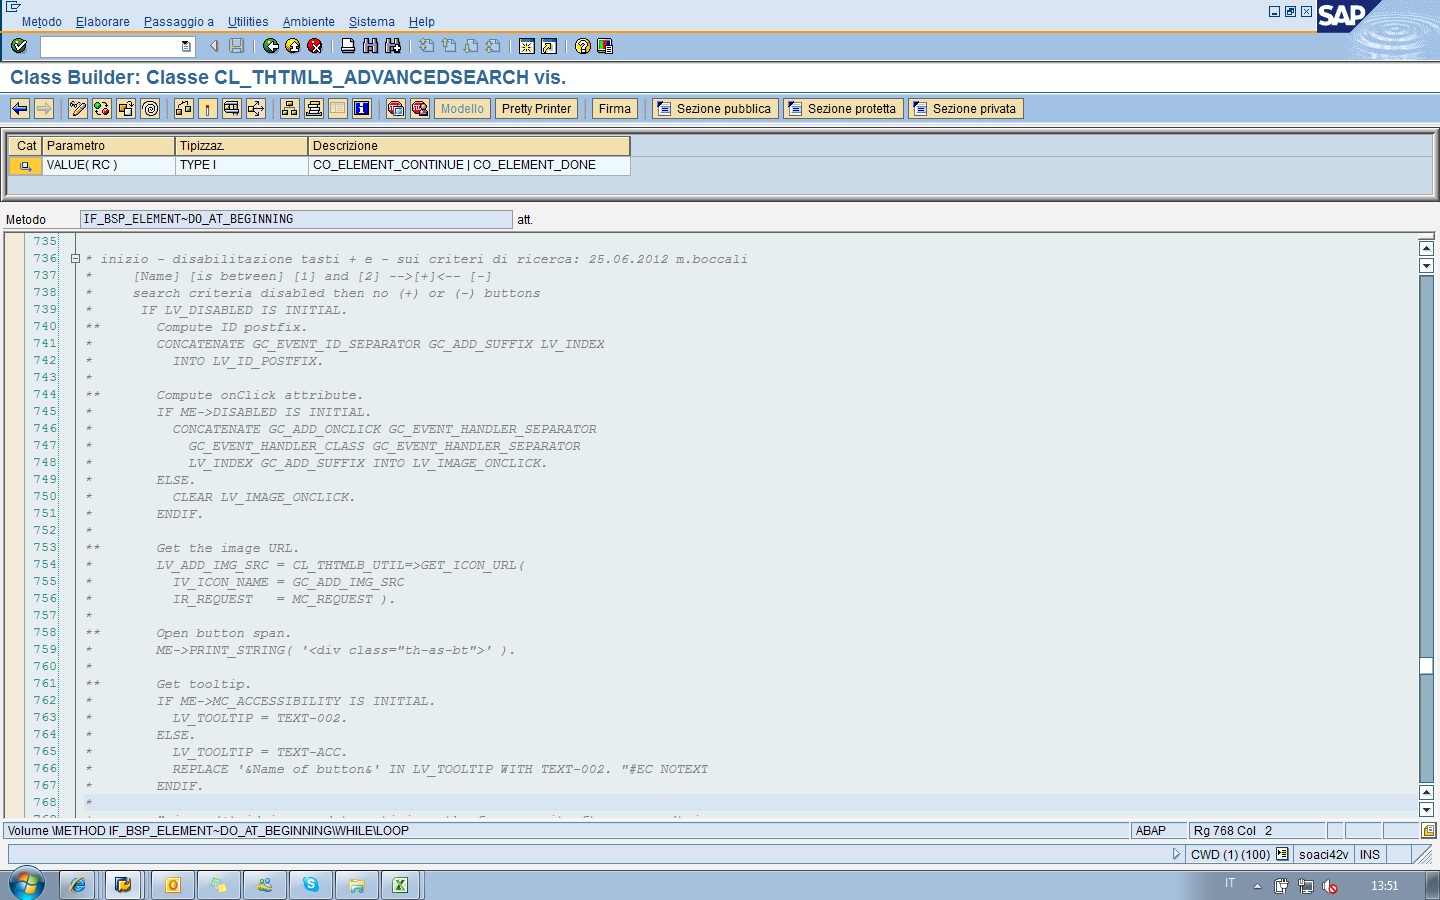
This change requires the access key for standard class CL_THTMLB_ADVANCEDSEARCH. The solution suggested below will be applied for all search pages but can be adjusted depending on customer requirements.

Open method IF_BSP_ELEMENT~DO_AT_BEGINNING and comment code from row 738 until row 887.

giovedì 12 luglio 2012

Duplicate a view of an existing BSP component

The BSP component BP_HEAD has several components that can be added in the overview page: in particular there is one component (BP_BPBT.AccountInterHist) that I added with label “Reclami”. Once I add a component to the visible blocks it is not possible to add again the same component. In this project I need to have the same view twice with same structure as the original because in one case it will display only objects for a particular process type, in a second case it will show objects for another particular process type.

Enter the BSP where you want to create the view of another BSP component (in our case BP_HEAD):

The wizard starts; type the name of the view you want to create:


Take note of the context nodes in the view we want to copy (in our case BP_BPBT/AccountInterHistOV)


And replicate same context nodes in the wizard:

Skip next step “Aggiungere nodo valore” and in step “Aggiungere attribute modello” add all attributes

Skip next step “Aggiungere attributi valore” and the next one. In next step select the view type: in our case we have a table view and the context node is BUILDINTERACTHIST:

Click on “Completare”

Type package and change request number when requested, then you will have the new view in your BSP component

Now in the viewarea of the viewset add the view created right now: 

The application is ZBP_HEAD and with matchcode you can find the view:

Click on save:

Now change the binding for BUILHEADER context node:

And type the following values:


Note: the system creates the view without the default configuration, so before test your view create a configuration!